Welcome to the blog

A string of thoughts, DIY, thrift scores, geeking out, sewing, crafting, and so on....

Welcome to the blog

A string of thoughts, DIY, thrift scores, geeking out, sewing, crafting, and so on...

Welcome to the blog

A string of thoughts, DIY, thrift scores, geeking out, sewing, crafting, and so on...

Welcome to the blog

A string of thoughts, DIY, thrift scores, geeking out, sewing, crafting, and so on...

Welcome to the blog

A string of thoughts, DIY, thrift scores, geeking out, sewing, crafting, and so on...

Showing posts with label tutorials. Show all posts

Sunday, February 15, 2015

From the Archives: 10 Tips for Healthy Cleaning and Living


Whether you have kids or not, its good to be (Im so sick of this word )"green". Its mainly good for you - which is most important. Lots of cleansers & household products are extremely harmful - which is why the companies never post the ingredients to their formulas; they don't want you to know you're buying something that's quite toxic. Well, here are a few ideas from the past that I've revamped :

1. Fix a squeaky hinge; door, box, wheel, etc. How do you do this? Easy, just spray the hinge with cooking spray like PAM or whatever type you use. Olive oil will also work, but it can get a bit runny.

2. Freshen up a room: Option A - get a small spray bottle -say 2 oz. - fill with water and a lovely smelling essential oil. (tip: use peppermint oil to really get the stench out of the room. My sister, who is a nurse, says this is what they do at hospitals when ...accidents happen). Shake it and spray til the room's scent is to your liking. Option B-Just get a small decorative jar and fill it with baking soda and a few drops of essential oil till its scent is to your liking - this works great in the washroom. I love the lemon/eucalyptus blend. God knows what is in Febreze!

3. Get a large spray bottle 16+ oz., fill with water and about 25 drops of Lavender & Tea Tree essential oil (its a combo oil). This should kill any mold and mildew thru out your home, just spray on surfaces and let air dry. It also smells great and works well as an air freshener too.

4. Use 1/4 cup vinegar during the rinse cycle when your doing laundry. It will work as a fabric softener without all the chemicals but with all the softness. And no, your clothes won't smell like vinegar.

5. Clean your windows, mirrors, glass with a spray that 50/50 water and vinegar (add an essential oil to tame the vinegary smell if you like) - but the smell goes away very quickly.

6. Try not to buy things new. If you can find them at the GoodWill or Salvation Army, do it. You can always find Target's clearance items at these shops so you can buy things 'new' too! You help others as well as finding cool stuff.

7. Used coffee grounds work to keep pests away from your plants. Make sure your plants can tolerate the acidity the grounds may add to the plant soil tho!

8. Kill weeds by spraying them with vinegar - careful not to spray what you want kept healthy in your yard/plant/garden. Vinegar can kill the important stuff too! Its better to use this then items like Round Up, which is very toxic.

9. Use baking soda to scrub just about anything - the oven range, toilet, bath tub, sinks, your teeth, etc. Dab some mixed with a bit of soap to get stains out of clothes as you would with Shout.

10. If you do buy any cleansers I highly recommend Dr. Bronner's Sal Suds. Its like an all-purpose miracle cleaner! Use it to wash your laundry; floors; bathrooms; counters; walls; dishes; car; fruits & vegetables; plus its mild & gentle on the skin. I swear it gets our hardwood floors looking cleaner and better than Murphy's Oil Soapdoes. And it lasts a LONG time - so its totally with the $9 - $12 for a 32 oz bottle - a little goes a long way.

Ok, thats all 10! I hope it helps anyone who needs it!

Image above from The Economist

Friday, February 11, 2011

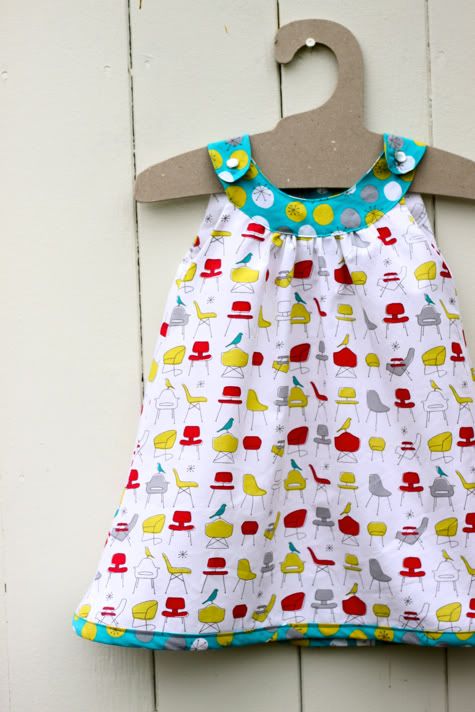
Free Snappy Toddler Dress Pattern


I saw this cute dress at Prudent Baby and since Spring is right around the corner - Lord willing - I thought this would be swell to make for my girls. The chair fabric is awesome!
Find the pattern here.

Monday, January 31, 2011

Make This a CRAFTY Blizzard

Its winter and there is not much to do so why not get some crafty stuff done. The blizzard is supposed to hit any day now so its time to finish that project that you've been dreading going back to OR try something new....like one -or all- of these 12 FREE purse patterns.

Penelope tote by Melissa Esplin
Twenty minute totes at The Purl Bee
Roomy pleated handbag at Warehouse Fabrics
Simple purse at Little Girl Pearl
Reversible beach bag by Soozs
Diana hobo bag at Think Liz
Pleated shoulder bag at Machen Machen
Zippered wristlets by Javajem Knits
Change purse with zipper by Viteen
Recycled grocery totes made from plastic bags at Made
Box pouch with handle by Drago[knit]fly
Lined, zippered pouch at Flossie Teacakes

Don't want to sew?
Then try these Stenciled animal mugs - and you can make them anything - not just livestock, but there are templates for said animals so.....

What you need:
  • Dishware
  • Contact Paper
  • PermEnamel
  • x-acto or craft knife 
  • pencil
  • scissors
  • patience
How to do it:
1. To duplicate these mugs, print and cut out the animal shapes. 
2. Use these templates for Cow, Sheep, and Pig shapes. (or what ever design you feel like)
3. Place each shape atop a small piece of contact paper and outline it in pencil. 
4. Cut out with a craft knife; then discard the paper inside the outline. 
5. Peel away the backing and affix the stencil to a clean, dry mug, making sure to center the image.
6. Following the package directions, use a soft brush to fill in the outline with dishwasher-safe PermEnamel paint ($3.49 for two ounces, joann.com); let set for a few minutes. 
7. Carefully remove the contact paper, clean up any edges with a damp cotton swab, and allow the paint to cure for 10 days.

Fun, aye?

Friday, January 21, 2011

Project Review - Online Edition: Bias Tape Bag @ Prudent Baby


Yes, it is a fact that I hate bias tape. Maybe even fear it - for it has jacked up so many potentially great projects for me. But in reality, who am I kidding - it's all me! I jack them up...usually in my anger over how much the bias tape aggravates me.

So, I've decided its time to conquer this devil and fear no more! I've always wanted to make a bias tape bag and I'll no longer let my fears and anger get in the way.

Over at Prudent Baby - I love this site, btw - They have a pattern for said bag and dagnabbit, I did it!

I would have finished sooner  - much sooner (the project states it should be an under-an-hour project). I like to multitask when I sew, and yes, watching tv is considered a task...and AMC was having a marathon of The Walking Dead so needless to say I was a bit distracted.. and it took about 4 hours.

So on to the review:
I used the only double folded bias tape I had. And it was tan. Hmph. The only fabric I had that would match was this lovely one - Freshcut by Heather Bailey. For the lining I used Objects of Desire by Sandy Gervais. What's cool is its reversible. I like that. The pattern was very clear and used lots of step-by-step pictures (I LOVE that!). The only thing I got a bit stuck on was how to sew the bias once you got to the "V" shape on the outer edges of the bag and how to 'finish' once the 2 ends other bias tape meet. I like how they pinned the fabric together with the pin ends facing out instead of in, the latter being seen most in sewing books and tutorials. This made sewing much easier and less stop-and-start. Also, they have a different take on sewing bias than what I've ever seen, and it was a breath of fresh air. Its very easy to make this bag and I recommend it to all skill levels.

Overall, I like it, bias no longer is my enemy and it got a pretty sweet bag out of it. Hooray.

Thursday, November 18, 2010

Upcycled Gift Box Tutorial

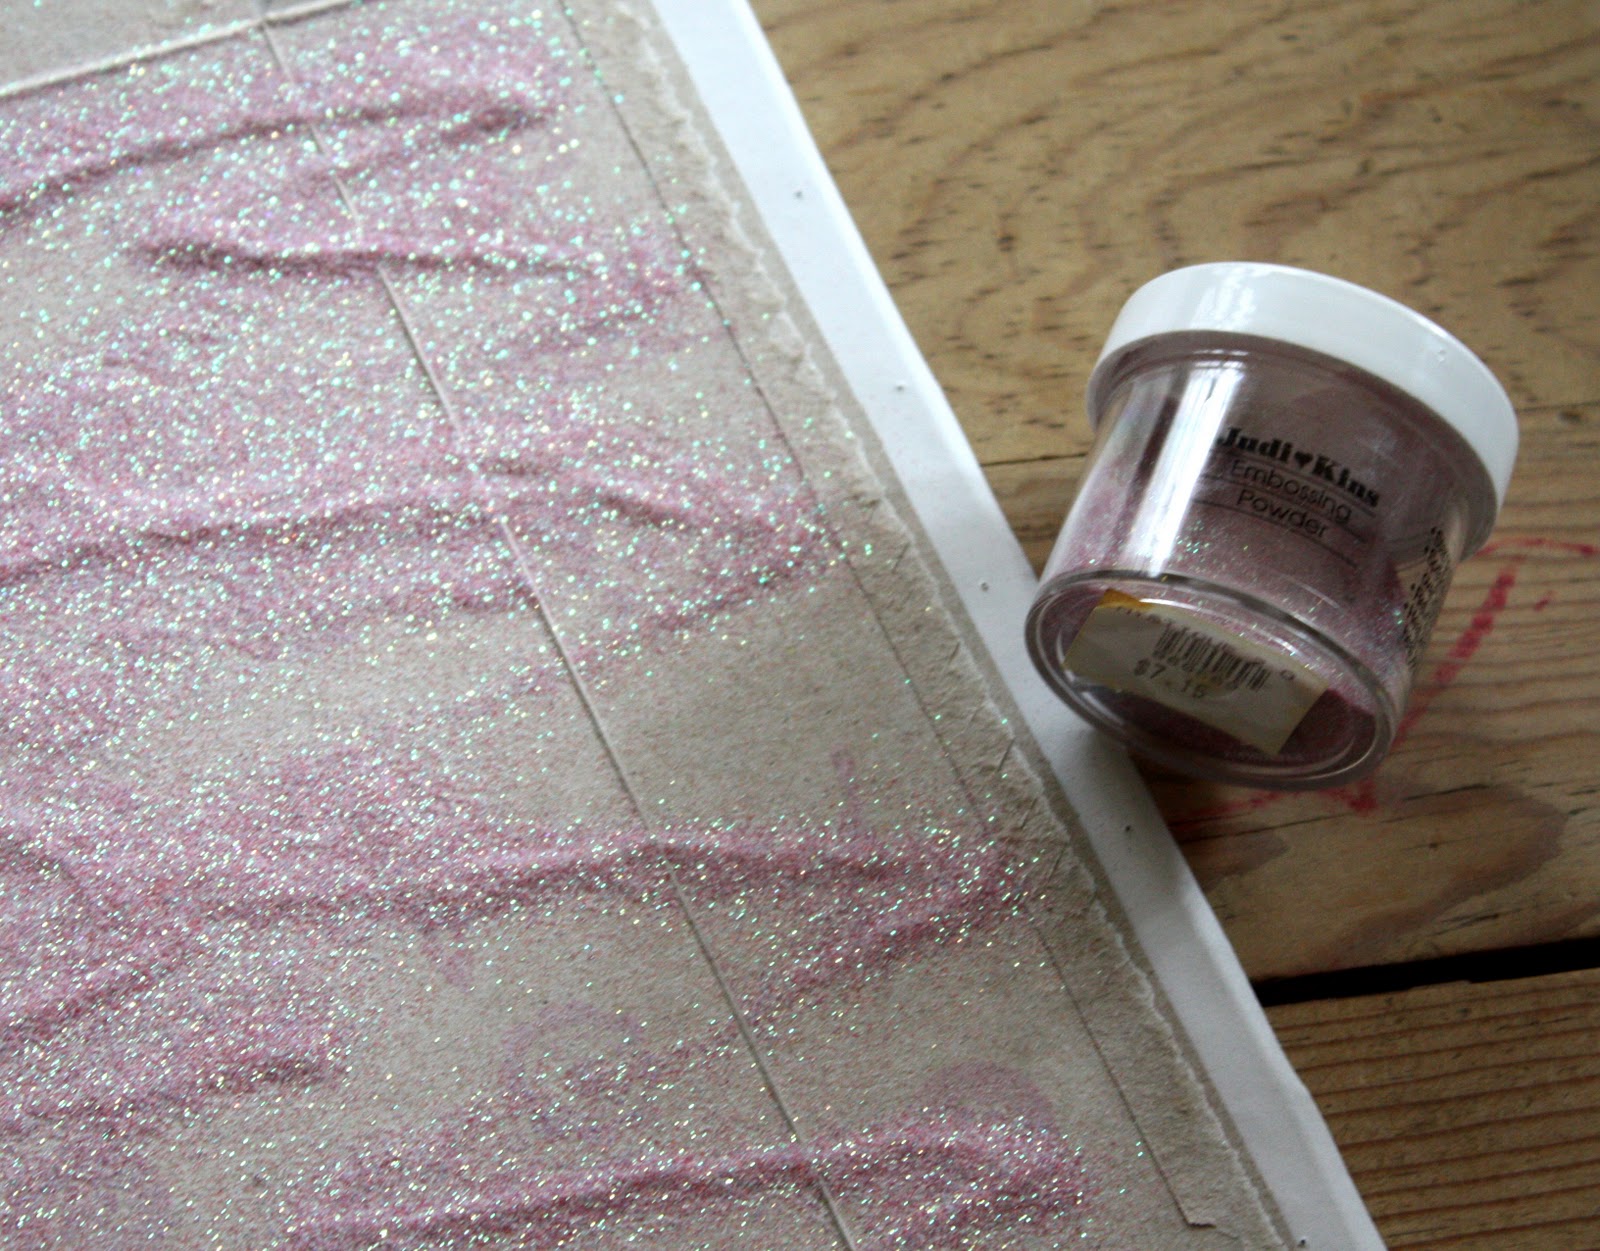
One super fast and easy way to wrap up some last minute gifts is to dress up some boxes lying around in the pantry. Here I used some small stamps to create a pattern and used some embossing powder ( just cuz I love sparkly stuff.)

What you will need:

  •  Boxes from cereal, crackers, pasta,etc. It can be any size, as long it has no damage or grease spots.
  • Stamps, stamping ink, glue (Stick is best, but I was out).
  • Ribbon or twine depending on how you want to finish it off.
  • Optional: Embossing powder and gun - its up to your tastes. You can just stamp it and leave it at that.


Now lets start. First you want to find the seam of the box

Place your finger -or letter opener, butter knife (non serrated side) between where the box is glued and gently separate them. You have to use caution at this part - the glue can be stubborn and you can rip the whole box apart if you're not careful...not to mention getting a paper cut!

Once that's done, open the box up and fold back all the creases, especially the small tab you just separated in the last step.

Now get out your stamps & ink and add your design.

If adding embossing powder, do it as soon as you finish stamping, otherwise if you wait long enough for the ink to dry, the powder wont have anything to adhere to. I recommend placing a large sheet of paper  underneath where you are working, that way you can shake off the excess powder onto it and funnel the powder back into the jar. 

Get your embossing gun, turn it on and let it heat up. Then slowly move over each image and you will see the colors and texture shifting as it becomes a finished embossed image. Don't stop on an image and heat it because that can burn your box.

Once that's cool, get your glue and glue the seam. A glue stick really works best because you wont get any bubbling like you would with liquid glue.

Join the seams, pressing firmly. I suggest laying a heavy book on top once you finish gluing to ensure a good bond.

Now when its dry, close up one end/opening by either gluing it or taping it, whichever you prefer. Then add your ribbon or twine. Put a gift in there and its ready to go!

Wednesday, November 17, 2010

Saturday, September 4, 2010

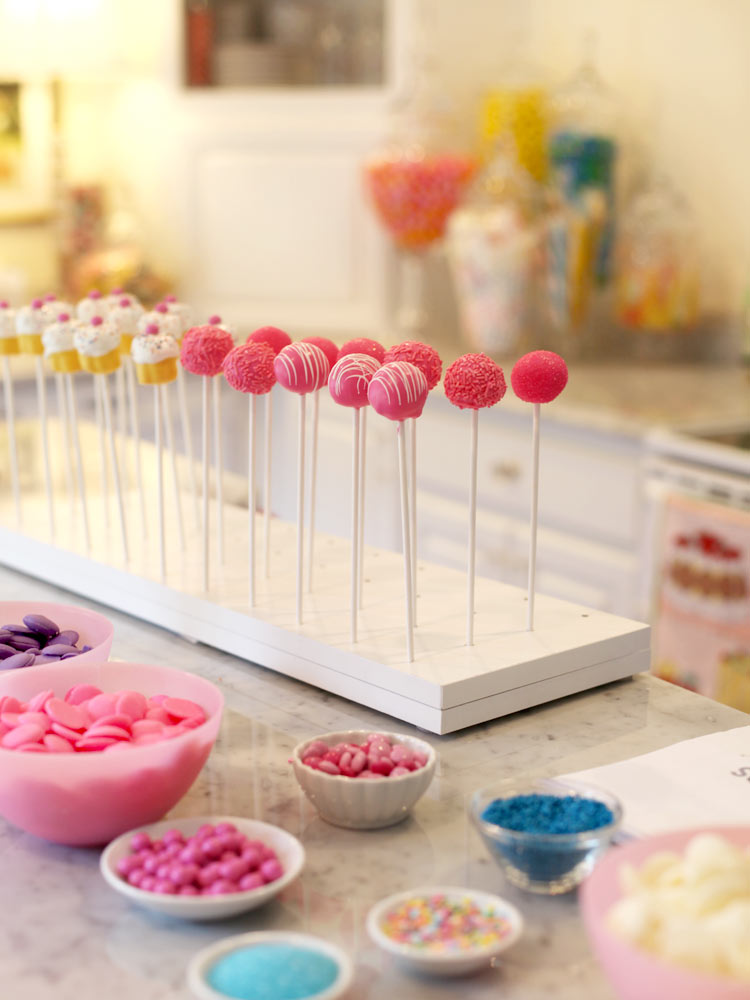
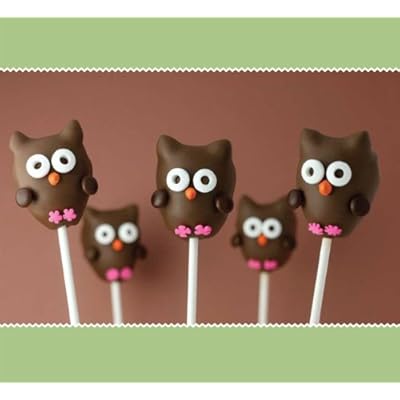
How To: Cake Pops with Bakerella

Image used  from Bakerella.com
 I love sweets. They may be my downfall one day, I'm sure my own blood has been replaced with cake batter. Anyway, I've seen these really cute cake pops that people make. They look adorable and delicious and I always wondered how they are made. I love the Bakerella blog for all its sweet wisdom and came across her Video How-To for her upcoming book:
Cake Pops: Tips, Tricks, and Recipes for More Than 40 Irresistible Mini Treat.

And with a price like that how could I NOT get it?! Just look at these....

Images from Amazon.com
OH, And I am doing my Craft Every Day Challenge - I need to post the pics. I've revamped a shelf, a wallet, and repurposed some other goods. Stay Tuned!

Thursday, August 12, 2010

How to Make Low-Fat Chocolate Chip Cookies with Applesauce

Ok, so since having Levi 4 months ago, losing weight has been one of those things that have been at the back of my mind yet still important. Lucky (I guess) for me when i got tendinitis I lost ten pounds due to my loss of appetite - the pain just pushed eating out of my daily routine, I suppose. Once the ol' appetite returned I thought of baking lots of yummy desserts - but that's not the smartest thing to do when wanting to shed pounds so I've been searching the interwebs for a good low fat cookie... to no avail. Every time - EVERY TIME it called for shortening...which is worse than butter in my book. I always heard of the applesauce urban legend and looked up recipes for that but they all wanted me to do more work than I wanted. I'm lazy like that. So I figured I'll just make my chocochip cookies with just a little switch-a-roo. I only made 1/4 order just in case they turned out disgusting...I didn't want to waste good ingredients.

Let me first say this; they turned out much better than i thought they would. The texture was a bit between cake and brownie...fluffy like cake and firmer like a brownie. This makes me think of maybe omitting egg next time to see how the texture is without it. I recommend dollops of dough on the cooking sheet - rolling won't be possible due to the consistency of the dough... its a bit tacky. So here is how its done:

In a large bowl mix
- 1/4 cup packed brown sugar
- 1/4 cup sugar

- 1/4 applesauce
Then throw in and mix
- 1/2 tsp vanilla extract
- 1/2 and egg (yes, I know this sounds weird, but do it!)
Now add and mix
- 1/2 cup Flour
- 1/2 tsp baking soda
- 1/4 tsp salt
Then add
- (another) 1/2 cup flour (you can add more in the consistency seems a bit to runny)
- 1/4 bag of semi-sweet chocolate chips
and mix

Preheat oven at 350 degrees and DO grease the baking sheet - they have no butter to help them off the pan so easily. Cook for about 8-11 minutes or until they start to brown. Cool and enjoy.

Wednesday, April 21, 2010

Earth Day Plan for the Frugal Future

In honor of Earth Day (you could also say 'in honor of frugality') I'm deciding to make my own reusable items - as many as I possibly can! I am done with skyrocketing prices even at the cheap stores (Walmart is not included, I refuse to shop there). I had to get baby wipes because I have a newborn and a 21 month old in diapers. I get them from target, and I get the target brand 3 pack of refills which used to cost 2.97 - now its 4.97. WTH?! So nuts to YOU Target, I'll make my own wipes! For those of you who agree...but may not sew yourself - here is a cute option... BareBebe PureBebe Cloth Wipes


 I also want to make my own produce bags. Who needs plastic poisoning their food? Not I. These ones are cool... Reusable Produce Bags by SeventhSphere

I already have the supplies to create some snack bags but I really thought these were cute.
Reusable Snack Bags by BananasaurusRex .  Its probably smart to make like 10 of these, since kids tend to lose, drop or destroy.


I'm still on the fence about making reusable paper towels...with 3 kids under 5, messes are plentiful. I would need to make about 50 reusable paper towels...I think in this arena, I'd opt for just buying them.

So in a few ways, I'm saving some green...which is what Earth Day is all about.

Wednesday, April 7, 2010

Make a Better Cup of Coffee


I got a bunch of Great Lakes Coffee from a friend who works for the company and it is the best coffee I've had in my life. Starbucks and any other corporate cafe cannot even compare! I used to enjoy simple coffee, say, from Dunkin Donuts - but now I can't stand the stuff. Now everything from everywhere tastes too burnt, watered down, and all around quite lackluster. Anyways, Great Lakes has great coffee - I made that point.

So while I was in the hospital for a week - some of my coffee was beginning to dry out...the beans were not as oily and aromatic once I got back...and that happens. So I decided to make some of it anyway - it was the Organic Costa Rica stuff. I really hate the taste that not-so-fresh coffee has so I thought of ways to make it taste better:
  1. Use the french press! I love the rich taste, body and frothiness you get from using it. Machines are good too - but I think some taste is lost - plus you don't have as much control over it as you do with the press.
  2. Before I added the boiling water to the press (its a 32oz press and I fill it with the max amount of coffee, btw) I added about 1/8 tsp each of ground cinnamon and cardamom to the dry grounds plus about 1/2 tsp of vanilla. Its best to add to the grounds and not to your cup afterward - since such powdery spices just sit on the surface and are hard to completely mix in.
  3. I then added the water and stirred it and pressed it.
  4. I poured a cup, added cream and sugar...I ran out of regular sugar so I had to use brown sugar, which I think gave it additional flavor.
  5. OMG - it was so tasty and I couldn't even tell the beans were 'getting on'!
It could may well have been that the coffee is just great old or fresh but I highly HIGHLY recommend Great Lakes Coffee - I especially enjoyed the Organic Triple Threat, its awesome!

Tuesday, April 6, 2010

Spell with Flickr

We all know the endless fun of Flicker and this has been around for a while but I just found it and thought it was pretty neat! Go to Spell with Flickr and type in anything! write a ransom letter - just for fun of course. Once you type in your words, just click on any letter you would like to change and it automatically changes it for you. For instance, The "L" they came up with looked like a 'c' so I clicked it until I got to one that was decent. Go now and check it out - you can type in your kid's name (like I did), create a new shop banner or whatever


Monday, March 22, 2010

If you have a love for Fonts...

If you love fonts, go here for over 1000 different fonts in all shapes and sizes - which includes some really fun graphic fonts - graphic as in some are little fun pictures of things aka Dingbats :) I usually type in my shop name when I feel like changing up my shop banner (which I recently did using said fonts). You just download them to your computer and install them - they will show up in all your programs like Word, Photoshop, etc.

Wednesday, February 10, 2010

Another Cute Valentine Tutorial

Make these cute paper hearts with the kiddies or to give out to friends..or whatever you want. Find the tutorial here. I thought it was a clever idea and, as the blog states, perfect projects for boys as well as girls. And boys should get some crafty exposure since they are going to be the ones "expected" to shower their sweetie with Valentines. True?

Wednesday, January 27, 2010

Hey Valentine, Feelin' Crafty?

I saw these cute conversation hearts over at whipup.net and thought we could make this in my sewing class I'm teaching next week! I really wanted to make some over sized ones out of clay for my Valentines in Clay class I taught over the weekend, but that idea will have to wait til next year. Here are a bunch of cute ideas for sweet things this V-day - some examples:All adorable, yes? Sometimes I wish guys really would dig these fun crafty things we can make them! Well, there are always parents, kids and friends to make them for.

Saturday, December 12, 2009

How To: Glittery Owl Hair Clip Holder

My daughter has a bunch of hair clips that always end up lost since there is no good place for her to store them. I had the idea of making her a cute clip holder out of my glitter vinyl and thought I'd git'r done since X-mas is fast approaching and time is running out. SO ...If you have any girls to make gifts for this Christmas, here is a fun one! This takes about 20 minutes AND no sewing is required!

FIRST, you will need your tools:
  • The owl template, all cut out (its best to print it on card stock!)
  • Scissors (good sharp ones)
  • Hot glue gun (low heat is what I use)
  • Glitter Vinyl
  • Spool of ribbon
Now, turn the vinyl to the backside and trace all the pieces on the color you're using for each body part. Cut each one out.

Once you have all your pieces cut out, arrange them however you like. I added a few more things that are not in the template - the scalloped 'feathers' on the belly and 2 more medium sized circles to add on the eyes. Of course you can add whatever other embellishments you like.

Carefully take your hot glue gun - make sure its plugged in ;) and glue the face on first, then 'feathers' if you make them, then wings last. Take about 2 feet of ribbon, cut it in half, flip the owl over (once glue dries) and glue the ribbon to the back and take another 4" of ribbon, make a loop and hot glue it to the back of the top so you have a way to hang it up. Done!

Now to wrap it up or hang and put it to some use!

Friday, June 5, 2009

DIY Baby Wooden Blocks

I got this from the Martha website - its a fun project for those who have kids and would rather make them a toy instead of getting them a lead coated one from across the ocean. Enjoy!

Make these adorable baby blocks for your child, and they'll be the coolest kid on the block.

Tools and Materials
3 1/4-inch square wood block
Sandpaper
Scissors
Acrylic paint
Mod Podge
Paintbrush
Decorative paper
Emery board
Letters, numbers, and embellishments
Sponge

Baby Wooden Blocks How To
1. Sand the wooden block with sandpaper to prepare it for painting.

2. Paint the block with the color you've selected. Allow to dry.

3. Cut 6 pieces of decorative paper to 3 1/4 inch.

4. Glue the paper to each side of the block using all-purpose Mod Podge. Allow the glue to dry.

5. Sand edges and corners of paper with an emery board.

6. Paste the letters, numbers, and embellishments to the block using the same technique.

7. Sponge the edges of the paper with paint to give it texture and an antique look.

8. Paint another coat of Mod Podge all over the block to seal. Allow to dry.

Resources
You can purchase the decorative paper and letters, numbers, and embellishments at Basic Grey Paper.

Special thanks to crafter Ashley Steele for showing us this beautiful craft.

Saturday, February 28, 2009

Fun Projects worth exploring

I've been on the lookout for new and interesting projects to delve into...here are a few ideas that have crossed my path:


Ok, I've been wanting to do some painting on dishes - plates, tea cups, mugs, you get the idea. So our former jail-bird friend Martha has a little cute idea on that line of thought. Very simple. Let's face it - life needs simplicity. I've got the paints to do it, i think I just may have to take a trip to the 2nd hand store and get some fun dishes to try it out on!

I've been wanting to make a mobile for the girls' room - but lacked the inspiration. Over at Sew, Mama, Sew - a favorite blog of mine, Amy from Badskirt shares a fun way to highlight some of your favorite fat quarters with her Fabric Mobile Tutorial. There are a ton of really awesome projects using only fat quarters that are posted on the Sew,Mama, Sew blog at this moment that need checking out! Find this very cool Deer Head tutorial over here at Chronical Books Blog. Its an art peice - a coat hook - a jewelry hanger - a scarf rack- you decide. It has the template right there on the page - just print out and start creating. All the materials are cheap and easy to find! I think I may have to try this one out sooner than later since I have no place to hang so many many accessories that are so very homeless.

Everyone and anyone should try these or just explore the fun blogs and sites!

Twitter Delicious Facebook Digg Stumbleupon Favorites More