Welcome to the blog

A string of thoughts, DIY, thrift scores, geeking out, sewing, crafting, and so on....

Welcome to the blog

A string of thoughts, DIY, thrift scores, geeking out, sewing, crafting, and so on...

Welcome to the blog

A string of thoughts, DIY, thrift scores, geeking out, sewing, crafting, and so on...

Welcome to the blog

A string of thoughts, DIY, thrift scores, geeking out, sewing, crafting, and so on...

Welcome to the blog

A string of thoughts, DIY, thrift scores, geeking out, sewing, crafting, and so on...

Showing posts with label craft everyday challenge. Show all posts

Friday, November 15, 2013

Handmade Holiday Idea: CrankHeartPony & Local Goods Chicago team up for jewelry making event!

If you've been wanting to get creative and make some handmade gifts this holiday season, then come on over to Local Goods Chicago on Saturday November 30th to make some wire wrapped nest pendants with me! These can be made into earrings, worn as a pendant on a necklace, as a brooch, a hair pin, add it to accent another piece of jewelry, and so on. Sign up here! It helps if you're in the Chicagoland area :)


Saturday, March 12, 2011

Project Review: One Yard Wonders - Folklore Bag

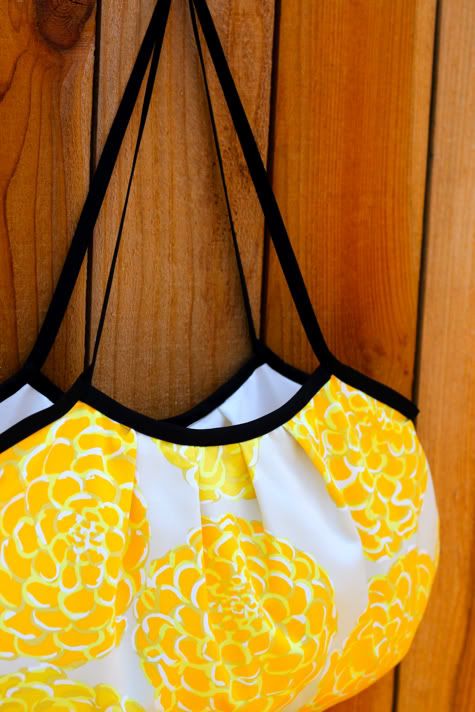
Finally! I finally found some time to review this nifty Folklore bag! The purse itself has been hanging in the closet for well over a month, I'd say. Well, this pattern comes from the very useful and fullofawesomelycoolpatterns, One Yard Wonders, page 159.
The turquoise owl fabric was actually a bed spread from Urban Outfitters that I found on clearance a while ago. I used to sell fat quarters of it in my shop and I had just enough left to make the bag. Seriously, I had not a scrap left! I just went with a simple off-white kona cotton lining and added lots of pockets, more than the pattern called for. You can never have too many pockets!


Now to the review! The instructions were very clear and easy. The hardest part is just getting all the pattern pieces traced and cut out; the sewing part was quite simple. If you decide to make this bag, don't forget to add the magnetic snap to the lining before you finish sewing it! I made that mistake. Good thing I keep the seam ripper close by! I thought it was a bit strange that you had to sew the top band together (so it made a circular band) before you attached it to the pleated bottom part of the bag. I always fear that my fabric won't line up properly...but it was fine. I just had to make sure I cut the pieces from the pattern exactly. (sometimes I wing it and well, haste makes waste!)

This was a great pattern and I'd love to make more of them with all my new Echino fabrics I just bought. Maybe make one for each day of the week...
I'd  definitely recommend the pattern to an intermediate to advanced seamstress..beginners can give it a whirl if they 're feeling adventurous.

Overall a great pattern with fabulous results! Now I think I'll just have to sell it in my shop or something. I have way too many bags lying around here!

For my next review, I'd love to do one about cloth diapers. I'll search around for a good pattern. If anyone knows of one, let me know!!

Friday, February 11, 2011

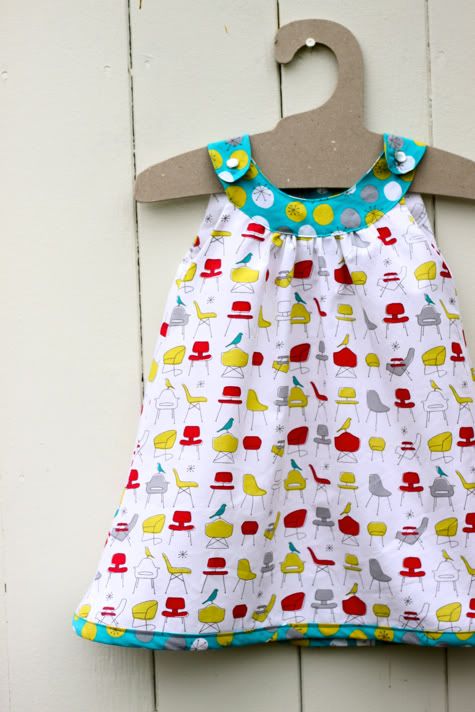
Free Snappy Toddler Dress Pattern


I saw this cute dress at Prudent Baby and since Spring is right around the corner - Lord willing - I thought this would be swell to make for my girls. The chair fabric is awesome!
Find the pattern here.

Friday, January 28, 2011

Project Review: City Satchel - Sew What! Bags


Today's Project Review is the City Satchel  found in Sew What! Bags, page 120.

I'll admit, I was a bit intimidated by this project but I found it was very easy despite the skill level being Daredevil. The fabrics I used are white Kona cotton for the lining and black cotton for the gusset. The main fabric I found at IKEA in the as-is section for 90 cents. Its a heavy canvas-like fabric. And there was JUST enough fabric for it too!

I really love the layout and imagery in this book. It made it simple enough visually that I didn't really need to read the instructions ( although I don't encourage that! ) I love all the pockets. I love making pockets too - its fun and that equals lots of organizing space in the bag! There are 2 on each side (gusset), 4 on the back and 3 under the flap. I added a few more to the inside as well. Can you really have too many pockets?

Options:
The pattern gives you the option to add a lining or not. I completely recommend adding the lining - it will give you a sturdier bag and a more finished look. You also have the option to add more pockets on the inside lining.

What I would Do Differently:
The pattern calls for a 8x44 piece for the strap, which I found WAY too long and wide for me. I cut mine down to about 38" and I would recommend a 6.5" width.

Overall this was a great pattern that is really fun and quite simple. May be a little hard for a newbie, but you can surely take a courageous crack at it.

Now what do I do with this....?

Friday, January 21, 2011

Project Review - Online Edition: Bias Tape Bag @ Prudent Baby


Yes, it is a fact that I hate bias tape. Maybe even fear it - for it has jacked up so many potentially great projects for me. But in reality, who am I kidding - it's all me! I jack them up...usually in my anger over how much the bias tape aggravates me.

So, I've decided its time to conquer this devil and fear no more! I've always wanted to make a bias tape bag and I'll no longer let my fears and anger get in the way.

Over at Prudent Baby - I love this site, btw - They have a pattern for said bag and dagnabbit, I did it!

I would have finished sooner  - much sooner (the project states it should be an under-an-hour project). I like to multitask when I sew, and yes, watching tv is considered a task...and AMC was having a marathon of The Walking Dead so needless to say I was a bit distracted.. and it took about 4 hours.

So on to the review:
I used the only double folded bias tape I had. And it was tan. Hmph. The only fabric I had that would match was this lovely one - Freshcut by Heather Bailey. For the lining I used Objects of Desire by Sandy Gervais. What's cool is its reversible. I like that. The pattern was very clear and used lots of step-by-step pictures (I LOVE that!). The only thing I got a bit stuck on was how to sew the bias once you got to the "V" shape on the outer edges of the bag and how to 'finish' once the 2 ends other bias tape meet. I like how they pinned the fabric together with the pin ends facing out instead of in, the latter being seen most in sewing books and tutorials. This made sewing much easier and less stop-and-start. Also, they have a different take on sewing bias than what I've ever seen, and it was a breath of fresh air. Its very easy to make this bag and I recommend it to all skill levels.

Overall, I like it, bias no longer is my enemy and it got a pretty sweet bag out of it. Hooray.

Monday, January 17, 2011

Project Review: Online Edition

I've decided, with all the great tutorials out there on the interwebz, I should try tackling a few of them. So I will. First up: Bias Tape bag at Prudent Baby. In this one, I'm hoping to overcome my hatred of bias tape.

Tuesday, January 11, 2011

Project Review: Oven Mitt & Hot Pads

Project Review: Oven Mitt & Hot Pads - One Yard Wonders, page 62.


Alright! Another one from One Yard Wonders! You know what I love about this book besides its multitude of great projects? The fabric choices! Honestly, if the fabric choices are lame or ugly, I'd never buy the book, I don't care HOW cool the patterns are! I may be shallow, but fabrics inspire me. :)

Anyway, back to the review...

Ok, so this one took a bit more time than the last one, but with good reason; you have a bit of quilting to do. I went to Hobby Lobby and got this super cute fabric from Brother and Sister Design Studio (they have quite a fabulous line and perfectly priced too at 4.89 a yard - on sale, but its ALWAYS on sale).  I just burnt my last pair of hot pads on the stove top (no clue how, either - its an electric range with safety settings) so this was another project used to create something I needed.

The instructions were great - very informative and easy to understand. There are quite a few steps, but all are handled as if they had me in mind...very easy to understand.

What I did different:
I quilted with invisible thread. I hate trying to coordinate my thread with fabrics so I go for no color at all. I didn't use bias tape on the hot pads either - bias tape is the bane of my existence. So instead of leaving raw edges, I sewn the holders RST, stitched around and turned right-side out, then used fabric glue to close the opening. I think its good for learning sewers to know that you can always change up a pattern to fit your comfort level. I am not comfortable with bias tape. I know how to use it, I just hate to.

What  I'd recommend: 
Quilt ALL your fabric before cutting any of your pieces out. It says to do this just for the mitt, but do it for all and it'll save you more time and annoyance. Believe me! Also, if your machine has a "darn" switch, use it. It makes the quilting go much smoother and you can have better control of  the design you make.

Overall, it was a great pattern and lots of fun to do. I'd recommend it to all skill levels... though the newbies should watch out for that bias tape!

Here they are and all their glory in my kitchen, ready to protect me from myself.
Saturday, January 8, 2011

Project Review: Ironing Board Cover

First project review down, who knows how many to go - I haven't counted but I will be doing a few from each book.
This time around I did the Tabletop Ironing Board Cover from One-Yard Wonders, page 54.
I sorely needed to make one for my sad, scuzzy looking ironing board that has sticky residue from my absent-minded ironing of fusible interfacing onto it on more than one occasion.Gross, isn't it?

SO- to the review!
I used flannel for the cover. The flannel is baby blue and brown polka dots and is from the JoAnn Fabrics line.  Why flannel? Why not! I like the soft feel and it was the only thing I had available to me at the time. I'll admit, the only other piece that fit the size was this really pretty Amy Butler fabric I had. But, I suppose the ironing board wasn't worthy of it :)
OK - now the instructions are clear but I would prefer some step-by-step imagery. I learn by seeing; reading about it alone doesn't help my mind comprehend what I'm supposed to be doing. But that's just me.  They didn't note a skill level - but maybe that's so the project doesn't scare anyone away.
I changed a few things from it as well. I didn't make the paper template they suggested, I just used a fabric marker (disappearing ink one) traced around the fabric using the board itself and cut like so:

I also did not use cording or a cord lock (like the things you see at the ends of your hoodie to tighten your hood around your face and make it stay that way). Instead, I threaded some 1/4" elastic in the casing, pulled it taught and tied & sewn the ends.
Overall, it was very simple and fun to make and only took about 45 minutes all together. I like how it turned out. I would recommend this to someone with sewing experience and one starting out as I think it's simple enough.
Now, that is MUCH better!

NEXT UP: Quilted Pot Holders

Monday, October 11, 2010

My New Shop: PeanutEnvy

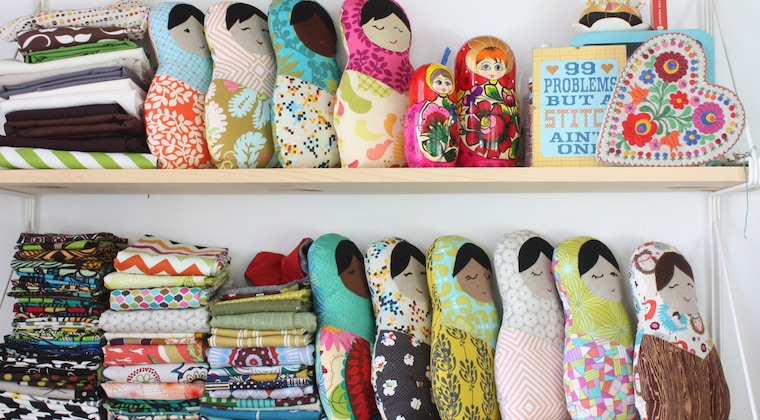
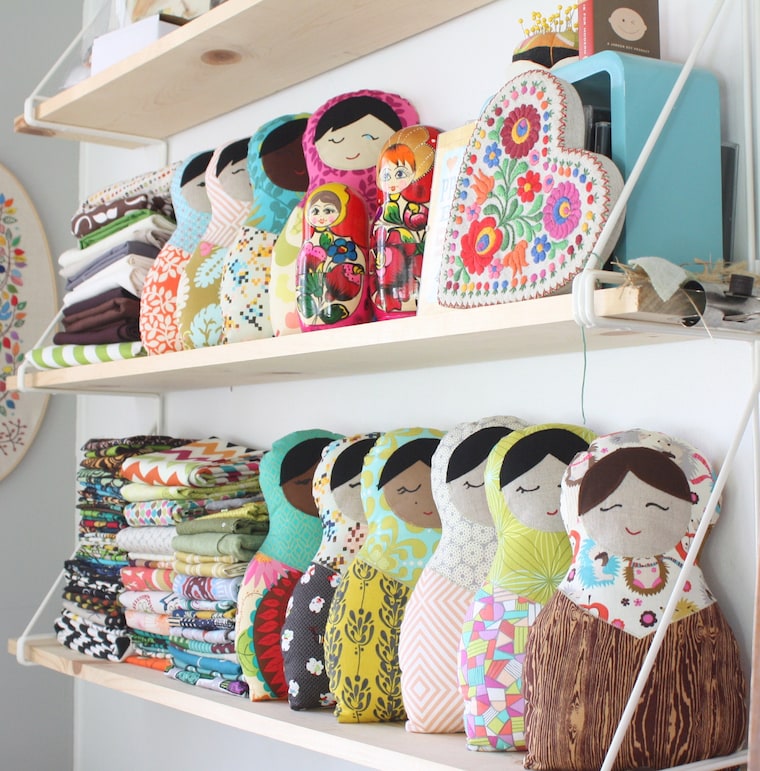
For 2 whole years I've been waiting to open this shop! For now I'll be selling these plush Matryoshka dolls til I try out some other patterns I've worked on. I was SO angry to see that someone out there jumped on my idea to make a certain something. An idea I've been sitting on that I thought was so cool which now won't be considered my original idea. I guess its a ya snooze ya lose kinda thing. Though, I swear someone is out there stealing ideas from my head! Do you ever think that there really are mind readers out there JUST to steal and sell your ideas. I think big businesses have them and exploit the heck out of it. Anyway, enough of my conspiracy theorizing...Peanut Envy is open! I've got more to list and 8 more in the making so in due time, the shop will be a bit more plentiful in regards to merch.

Tuesday, August 17, 2010

Craft Everyday Challenge!

OK, ok ,ok. I've got my craft room all set up so no excuses, right? I've decided to challenge myself to at least do ONE crafty thing a day. This does not mean I have to complete a crafty project everyday...I can work on one that takes me a week or a month, but I have to work on it at least once a day. Its hard to stay inspired these days when I feel like I have so little time to do much with the kids, working on the house, etc - which is why I'm pushing myself . So far I have covered the switch plates with some super cute paper in my kitchen:


I also recycled an old coffee can but covering it with some neat vintage fabric and ribbon for a place to put scissors and stuff.
Now my current project is to give a small shelf w/ key hooks a bit of a makeover. We'll soon see how that turned out.

Twitter Delicious Facebook Digg Stumbleupon Favorites More