Welcome to the blog

A string of thoughts, DIY, thrift scores, geeking out, sewing, crafting, and so on....

Welcome to the blog

A string of thoughts, DIY, thrift scores, geeking out, sewing, crafting, and so on...

Welcome to the blog

A string of thoughts, DIY, thrift scores, geeking out, sewing, crafting, and so on...

Welcome to the blog

A string of thoughts, DIY, thrift scores, geeking out, sewing, crafting, and so on...

Welcome to the blog

A string of thoughts, DIY, thrift scores, geeking out, sewing, crafting, and so on...

Showing posts with label sewing. Show all posts

Saturday, June 28, 2014

A Rare Sale at the PeanutEnvy Shop!


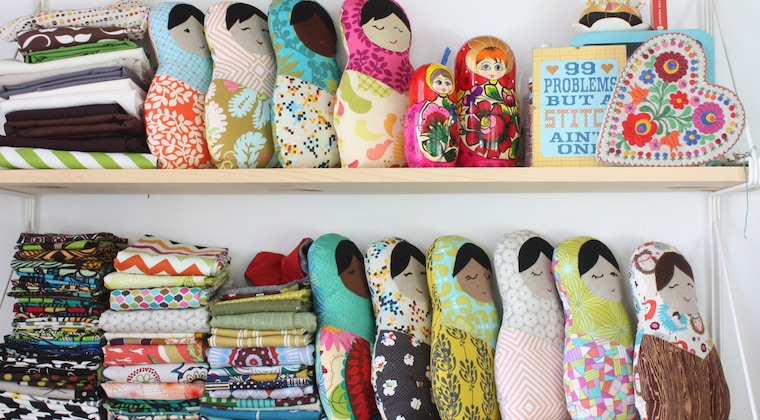
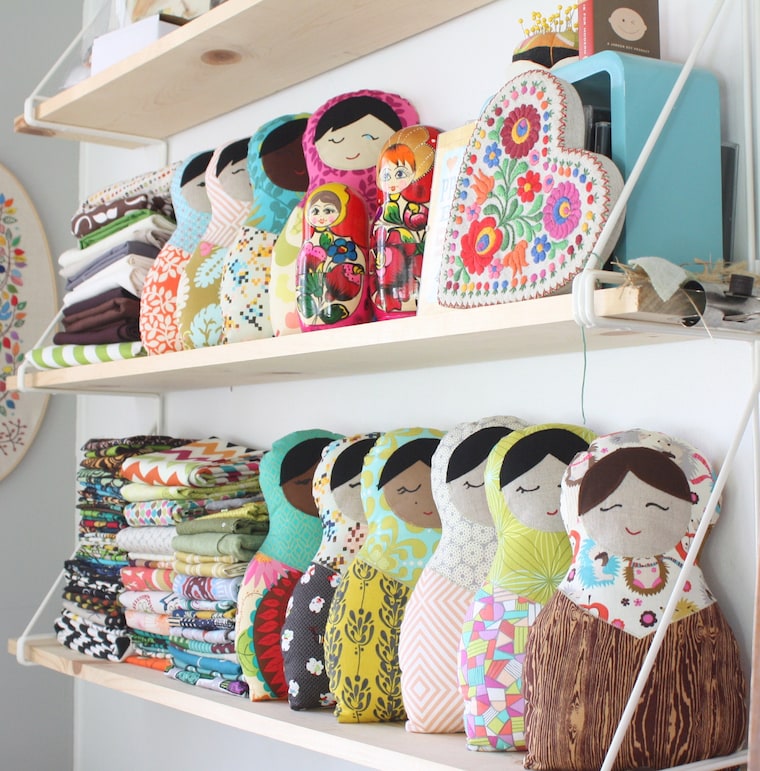
There is quite the sale going on at PeanutEnvy..and a rare one too! All Russian dolls are $25{reg. $34}, Owls are $35 {reg. $42} and wallets a mere $10 {reg. $14}. There is a new member to the PE family and that would be Fritz the Fox...see him below! That guy is also $25! For more sales and updates with the shop, check out our Facebook page!


Tuesday, November 5, 2013

New Photo Props for Peanutenvy

After I've redesigned my dolls to be bigger and better with stronger stitching and overall stability, I've also found a fun new way to take pictures. I know this method has been around for a long while, but I never really wanted to use it until now: the chalkboard prop. For some reason the dark background helps showcase the dolls without washing them out with the overexposed look I'd get from a white background. Its also a great way to have your name in the picture without having to go through the trouble of a watermark! (A good way to cut THAT corner) Not to mention all the fun things you can include...quotes, name of the work, fun drawn designs...am I thinking too much into this??

Check out the shop!
Ella the Russian Doll
Rowan the Owl Pocket Plush

Bella the Russian Doll

Friday, September 27, 2013

Sewing Studio Revamp, More Dolls, and it has been a while!

I have had such a full plate for the last year, so I have not been on here at all, really.  It has been just a pretty overwhelmed-with-life-in-general kind of thing. When you have 3 kids, homeschool them, own 2 shops, work a job, etc... the leisurely things get pushed to the back burner. And that's what happened. But I am back! Blogging seems strange and foreign to me now...but I'll be sure to be more diligent!

So - update!

I've recently redesigned my PeanutEnvy dolls and have added Owl pillows to the shop. The dolls are larger and (in my opinion) cuter. Since I've started using inks for the faces instead of embroidering them on, making them has been *slightly* easier..but overall they are still quite involved especially with all the appliqueing I have to do for the heads alone. But I'm not complaining...I enjoy sewing these lovelies, even if there are, like, 20 steps.

I have also revamped my sewing studio for the better. Now its a place I want to be at all times...and so do the children, but I can't blame them :) You can see the last revamp in this post here. I like this new set up MUCH better. And I have a new sewing machine to boot! The light in the room is perfect! I can even lock the door from the inside as to ward off unwanted intruders...or to hide while I eat something I certainly do not want to share. 

 Now that life is down to a simmer, I can finally get some sewing done. Fall has always been the perfect time for it anyway since all the summer fun comes to a close. And I hope it also means I'll be posting more as well!

Saturday, March 12, 2011

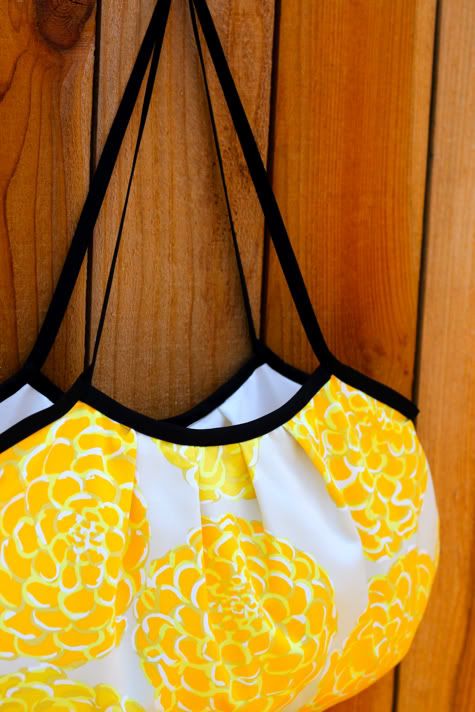
Project Review: One Yard Wonders - Folklore Bag

Finally! I finally found some time to review this nifty Folklore bag! The purse itself has been hanging in the closet for well over a month, I'd say. Well, this pattern comes from the very useful and fullofawesomelycoolpatterns, One Yard Wonders, page 159.
The turquoise owl fabric was actually a bed spread from Urban Outfitters that I found on clearance a while ago. I used to sell fat quarters of it in my shop and I had just enough left to make the bag. Seriously, I had not a scrap left! I just went with a simple off-white kona cotton lining and added lots of pockets, more than the pattern called for. You can never have too many pockets!


Now to the review! The instructions were very clear and easy. The hardest part is just getting all the pattern pieces traced and cut out; the sewing part was quite simple. If you decide to make this bag, don't forget to add the magnetic snap to the lining before you finish sewing it! I made that mistake. Good thing I keep the seam ripper close by! I thought it was a bit strange that you had to sew the top band together (so it made a circular band) before you attached it to the pleated bottom part of the bag. I always fear that my fabric won't line up properly...but it was fine. I just had to make sure I cut the pieces from the pattern exactly. (sometimes I wing it and well, haste makes waste!)

This was a great pattern and I'd love to make more of them with all my new Echino fabrics I just bought. Maybe make one for each day of the week...
I'd  definitely recommend the pattern to an intermediate to advanced seamstress..beginners can give it a whirl if they 're feeling adventurous.

Overall a great pattern with fabulous results! Now I think I'll just have to sell it in my shop or something. I have way too many bags lying around here!

For my next review, I'd love to do one about cloth diapers. I'll search around for a good pattern. If anyone knows of one, let me know!!

Friday, February 11, 2011

Free Snappy Toddler Dress Pattern


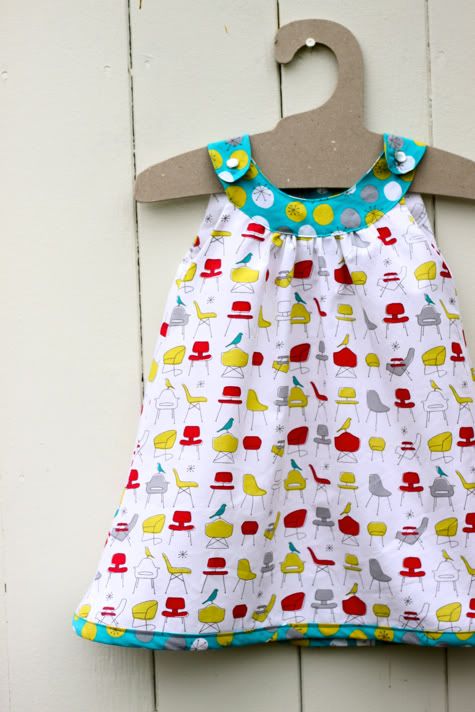
I saw this cute dress at Prudent Baby and since Spring is right around the corner - Lord willing - I thought this would be swell to make for my girls. The chair fabric is awesome!
Find the pattern here.

Monday, January 31, 2011

Make This a CRAFTY Blizzard

Its winter and there is not much to do so why not get some crafty stuff done. The blizzard is supposed to hit any day now so its time to finish that project that you've been dreading going back to OR try something new....like one -or all- of these 12 FREE purse patterns.

Penelope tote by Melissa Esplin
Twenty minute totes at The Purl Bee
Roomy pleated handbag at Warehouse Fabrics
Simple purse at Little Girl Pearl
Reversible beach bag by Soozs
Diana hobo bag at Think Liz
Pleated shoulder bag at Machen Machen
Zippered wristlets by Javajem Knits
Change purse with zipper by Viteen
Recycled grocery totes made from plastic bags at Made
Box pouch with handle by Drago[knit]fly
Lined, zippered pouch at Flossie Teacakes

Don't want to sew?
Then try these Stenciled animal mugs - and you can make them anything - not just livestock, but there are templates for said animals so.....

What you need:
  • Dishware
  • Contact Paper
  • PermEnamel
  • x-acto or craft knife 
  • pencil
  • scissors
  • patience
How to do it:
1. To duplicate these mugs, print and cut out the animal shapes. 
2. Use these templates for Cow, Sheep, and Pig shapes. (or what ever design you feel like)
3. Place each shape atop a small piece of contact paper and outline it in pencil. 
4. Cut out with a craft knife; then discard the paper inside the outline. 
5. Peel away the backing and affix the stencil to a clean, dry mug, making sure to center the image.
6. Following the package directions, use a soft brush to fill in the outline with dishwasher-safe PermEnamel paint ($3.49 for two ounces, joann.com); let set for a few minutes. 
7. Carefully remove the contact paper, clean up any edges with a damp cotton swab, and allow the paint to cure for 10 days.

Fun, aye?

Friday, January 28, 2011

Project Review: City Satchel - Sew What! Bags


Today's Project Review is the City Satchel  found in Sew What! Bags, page 120.

I'll admit, I was a bit intimidated by this project but I found it was very easy despite the skill level being Daredevil. The fabrics I used are white Kona cotton for the lining and black cotton for the gusset. The main fabric I found at IKEA in the as-is section for 90 cents. Its a heavy canvas-like fabric. And there was JUST enough fabric for it too!

I really love the layout and imagery in this book. It made it simple enough visually that I didn't really need to read the instructions ( although I don't encourage that! ) I love all the pockets. I love making pockets too - its fun and that equals lots of organizing space in the bag! There are 2 on each side (gusset), 4 on the back and 3 under the flap. I added a few more to the inside as well. Can you really have too many pockets?

Options:
The pattern gives you the option to add a lining or not. I completely recommend adding the lining - it will give you a sturdier bag and a more finished look. You also have the option to add more pockets on the inside lining.

What I would Do Differently:
The pattern calls for a 8x44 piece for the strap, which I found WAY too long and wide for me. I cut mine down to about 38" and I would recommend a 6.5" width.

Overall this was a great pattern that is really fun and quite simple. May be a little hard for a newbie, but you can surely take a courageous crack at it.

Now what do I do with this....?

Friday, January 21, 2011

Project Review - Online Edition: Bias Tape Bag @ Prudent Baby


Yes, it is a fact that I hate bias tape. Maybe even fear it - for it has jacked up so many potentially great projects for me. But in reality, who am I kidding - it's all me! I jack them up...usually in my anger over how much the bias tape aggravates me.

So, I've decided its time to conquer this devil and fear no more! I've always wanted to make a bias tape bag and I'll no longer let my fears and anger get in the way.

Over at Prudent Baby - I love this site, btw - They have a pattern for said bag and dagnabbit, I did it!

I would have finished sooner  - much sooner (the project states it should be an under-an-hour project). I like to multitask when I sew, and yes, watching tv is considered a task...and AMC was having a marathon of The Walking Dead so needless to say I was a bit distracted.. and it took about 4 hours.

So on to the review:
I used the only double folded bias tape I had. And it was tan. Hmph. The only fabric I had that would match was this lovely one - Freshcut by Heather Bailey. For the lining I used Objects of Desire by Sandy Gervais. What's cool is its reversible. I like that. The pattern was very clear and used lots of step-by-step pictures (I LOVE that!). The only thing I got a bit stuck on was how to sew the bias once you got to the "V" shape on the outer edges of the bag and how to 'finish' once the 2 ends other bias tape meet. I like how they pinned the fabric together with the pin ends facing out instead of in, the latter being seen most in sewing books and tutorials. This made sewing much easier and less stop-and-start. Also, they have a different take on sewing bias than what I've ever seen, and it was a breath of fresh air. Its very easy to make this bag and I recommend it to all skill levels.

Overall, I like it, bias no longer is my enemy and it got a pretty sweet bag out of it. Hooray.

Monday, January 17, 2011

Project Review: Online Edition

I've decided, with all the great tutorials out there on the interwebz, I should try tackling a few of them. So I will. First up: Bias Tape bag at Prudent Baby. In this one, I'm hoping to overcome my hatred of bias tape.

Tuesday, January 11, 2011

Project Review: Oven Mitt & Hot Pads

Project Review: Oven Mitt & Hot Pads - One Yard Wonders, page 62.


Alright! Another one from One Yard Wonders! You know what I love about this book besides its multitude of great projects? The fabric choices! Honestly, if the fabric choices are lame or ugly, I'd never buy the book, I don't care HOW cool the patterns are! I may be shallow, but fabrics inspire me. :)

Anyway, back to the review...

Ok, so this one took a bit more time than the last one, but with good reason; you have a bit of quilting to do. I went to Hobby Lobby and got this super cute fabric from Brother and Sister Design Studio (they have quite a fabulous line and perfectly priced too at 4.89 a yard - on sale, but its ALWAYS on sale).  I just burnt my last pair of hot pads on the stove top (no clue how, either - its an electric range with safety settings) so this was another project used to create something I needed.

The instructions were great - very informative and easy to understand. There are quite a few steps, but all are handled as if they had me in mind...very easy to understand.

What I did different:
I quilted with invisible thread. I hate trying to coordinate my thread with fabrics so I go for no color at all. I didn't use bias tape on the hot pads either - bias tape is the bane of my existence. So instead of leaving raw edges, I sewn the holders RST, stitched around and turned right-side out, then used fabric glue to close the opening. I think its good for learning sewers to know that you can always change up a pattern to fit your comfort level. I am not comfortable with bias tape. I know how to use it, I just hate to.

What  I'd recommend: 
Quilt ALL your fabric before cutting any of your pieces out. It says to do this just for the mitt, but do it for all and it'll save you more time and annoyance. Believe me! Also, if your machine has a "darn" switch, use it. It makes the quilting go much smoother and you can have better control of  the design you make.

Overall, it was a great pattern and lots of fun to do. I'd recommend it to all skill levels... though the newbies should watch out for that bias tape!

Here they are and all their glory in my kitchen, ready to protect me from myself.
Saturday, January 8, 2011

Project Review: Ironing Board Cover

First project review down, who knows how many to go - I haven't counted but I will be doing a few from each book.
This time around I did the Tabletop Ironing Board Cover from One-Yard Wonders, page 54.
I sorely needed to make one for my sad, scuzzy looking ironing board that has sticky residue from my absent-minded ironing of fusible interfacing onto it on more than one occasion.Gross, isn't it?

SO- to the review!
I used flannel for the cover. The flannel is baby blue and brown polka dots and is from the JoAnn Fabrics line.  Why flannel? Why not! I like the soft feel and it was the only thing I had available to me at the time. I'll admit, the only other piece that fit the size was this really pretty Amy Butler fabric I had. But, I suppose the ironing board wasn't worthy of it :)
OK - now the instructions are clear but I would prefer some step-by-step imagery. I learn by seeing; reading about it alone doesn't help my mind comprehend what I'm supposed to be doing. But that's just me.  They didn't note a skill level - but maybe that's so the project doesn't scare anyone away.
I changed a few things from it as well. I didn't make the paper template they suggested, I just used a fabric marker (disappearing ink one) traced around the fabric using the board itself and cut like so:

I also did not use cording or a cord lock (like the things you see at the ends of your hoodie to tighten your hood around your face and make it stay that way). Instead, I threaded some 1/4" elastic in the casing, pulled it taught and tied & sewn the ends.
Overall, it was very simple and fun to make and only took about 45 minutes all together. I like how it turned out. I would recommend this to someone with sewing experience and one starting out as I think it's simple enough.
Now, that is MUCH better!

NEXT UP: Quilted Pot Holders

Wednesday, January 5, 2011

Books: Pattern Reviews

I have a love for 2 things; Sewing and Books. My favorite thing is when they come together to create my ultimate favorite thing; a sewing book full of fun patterns. I have numerous crafty sewing books and not all are put to as good of use as I intended when I got them. So here comes the challenge: I will pick one pattern - or maybe a few - from all the books I have yet to make something from. I think all this time I just liked to look at all the fun projects, yet never decided on a fabric to create them - I get very picky about using certain fabrics - like the project has to be worthy enough for me to use it...like my Echino fabric I hold so dear. And God forbid I screw it up and waste the precious fabric. God. Forbid.

 I will be using the following books for this Pattern Review:
I'll be looking at the following:
1. What book,  pattern and the page its on.
2. What fabrics I have chosen - designers, colorways - if available. I do have a boat load of vintage fabrics Morgan gave me that I may use, but we'll see.
3. Clarity of instructions and imagery.
4. Easy/ Difficulty of the pattern (usually stated in the book).
5. Was it fun to make.
6. How do I like the finished product since it can be hard to tell from just the pictures.
7. Whether  I'd  recommend the pattern/book to a beginner or one who wants to sharpen their sewing skills.

I'm excited to do this - it will give me a reason to sew and learn a few new things. I hope to sew some clothing from a few of them too! I have that dress form my husband got me 2 Christmases ago - I should probably use that since he keeps making me feel guilty for not.

I'll get cracking on this asap!

Wednesday, November 17, 2010

Monday, October 11, 2010

My New Shop: PeanutEnvy

For 2 whole years I've been waiting to open this shop! For now I'll be selling these plush Matryoshka dolls til I try out some other patterns I've worked on. I was SO angry to see that someone out there jumped on my idea to make a certain something. An idea I've been sitting on that I thought was so cool which now won't be considered my original idea. I guess its a ya snooze ya lose kinda thing. Though, I swear someone is out there stealing ideas from my head! Do you ever think that there really are mind readers out there JUST to steal and sell your ideas. I think big businesses have them and exploit the heck out of it. Anyway, enough of my conspiracy theorizing...Peanut Envy is open! I've got more to list and 8 more in the making so in due time, the shop will be a bit more plentiful in regards to merch.

Wednesday, April 21, 2010

Earth Day Plan for the Frugal Future

In honor of Earth Day (you could also say 'in honor of frugality') I'm deciding to make my own reusable items - as many as I possibly can! I am done with skyrocketing prices even at the cheap stores (Walmart is not included, I refuse to shop there). I had to get baby wipes because I have a newborn and a 21 month old in diapers. I get them from target, and I get the target brand 3 pack of refills which used to cost 2.97 - now its 4.97. WTH?! So nuts to YOU Target, I'll make my own wipes! For those of you who agree...but may not sew yourself - here is a cute option... BareBebe PureBebe Cloth Wipes


 I also want to make my own produce bags. Who needs plastic poisoning their food? Not I. These ones are cool... Reusable Produce Bags by SeventhSphere

I already have the supplies to create some snack bags but I really thought these were cute.
Reusable Snack Bags by BananasaurusRex .  Its probably smart to make like 10 of these, since kids tend to lose, drop or destroy.


I'm still on the fence about making reusable paper towels...with 3 kids under 5, messes are plentiful. I would need to make about 50 reusable paper towels...I think in this arena, I'd opt for just buying them.

So in a few ways, I'm saving some green...which is what Earth Day is all about.

Friday, September 11, 2009

Sewing & Craft books I want...now!

Ok, I was killing time with the kids over at Borders today and love to peruse thru the sewing/craft section...I could spend hours looking at these books. Some that caught my attention are the following:
Zakka Sewing- How cute is a squirrel shaped tea cozy!? This book is filled with cute and unique projects from pot holders, pillows and pouches.

Sewing Green - This has a bunch of cool "green" projects I want to try...just look at that way cool scarf! Who wouldn't want to make that?

Another good repurposing book is Handmade Home - they got kids stuff and other cute ideas for the home - I love stuff like that.
Chic and simple Sewing - I've been in dire need to use my dressform Morgan got me for Christmas last year, mainly cuz he keeps pressuring me to use it..but I thought this would be a perfect book to help kick-start some dressform usage.
One I saw and instantly loved was CROBOTS - now there's something I don't see everyday! Tho I do crochet, I cant read a pattern to save my life...I mean I can - but I could never master the Amigurumi.Another amigurumi book I thought would be perfect for Halloween time was Creepy Cute Crochet - adorable and its pretty cheap over at Amazon. Again, I wish I could create these...I just need a really patient teacher to teach me all this.

Well, thats it for now. If anyone has these books and has any feedback, it would be appreciated!

Twitter Delicious Facebook Digg Stumbleupon Favorites More